How to install Lightroom Presets
One of the known software issues is that the zip function may not work correctly under Windows. In most such cases it is advised to use the file extractor downloadable at http://www.7zip.
Installing Lightroom presets
Method 1
-
Extract the preset choosing the folder where you want to store it. Right-click the preset with your mouse and make a copy of it.
-
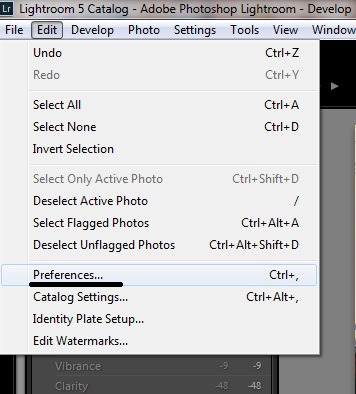
Run the Lightroom app, proceed to the Edit menu, click Preferences and choose the Presets option.
-
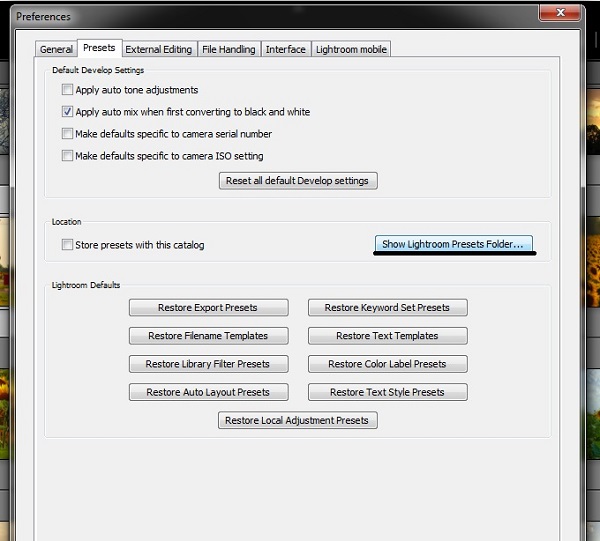
Find and click the button that reads ‘Show Lightroom Presets Folder’.
-
It will open the catalogue for you. Go to Lightroom – Develop Presets. Create a new catalogue and copy your preset there. You may also go to User Presets by right-clicking it in the catalogue and choose the Paste menu.
-
Restart Lightroom to make the preset available.
Installing Lightroom presets – with the second method you won’t need to restart the program.
-
Unzip the downloaded folder containing the preset.
-
Run the application.
-
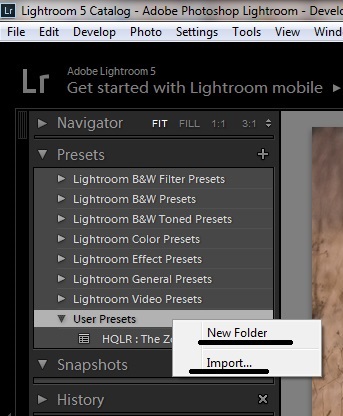
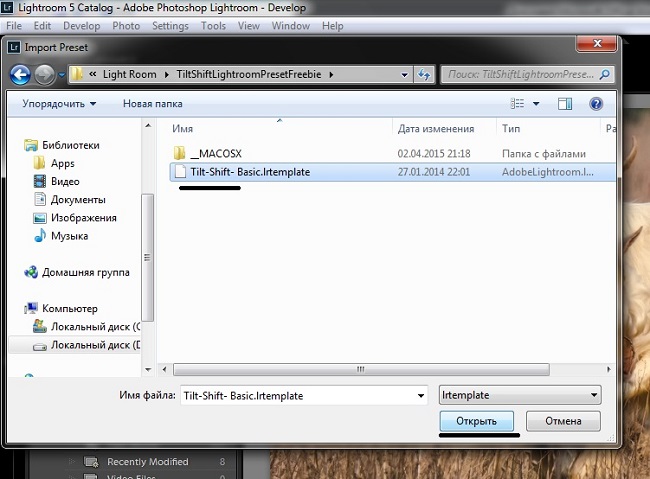
Go to Develop option, in Presets, right-click the catalogue User Presets. It will ask you whether you want to create a new catalogue or to import. I prefer the Import command.
-
With the Import option you will only have to choose the folder with the extracted preset, choose the preset file and press Open.
And there you are! Your preset is ready for use. You may start editing your photos.