Learning the Lightroom interface
This is our first lesson in Adobe Photoshop Lightroom. Let’s see what this wonderful program has to offer.
What is Lightroom? Is it an Adobe application serving as Bridge? The answer is ‘no’.
The chief purpose of Lightroom is to offer a unified app for editing and storing images – within the same ‘shell’. When you use Photoshop for image editing you have to store the graphic original and the .psd image separately and save the result in a particular format (png, jpeg, jpg, gif). While Adobe Lightroom allows you to import a folder or a separate image, run your edits and unload the result. When you open Lightroom next time there is no need to upload the images again. All, that was once imported, remains there as long as you wish.
Although the idea is a bit contrary to the tried and true philosophy of software (do one thing but do it well) the Lightroom approach works and works fine.
One more good reason to opt for Lightroom is the RAW format. The well-known Bridge problem with editing RAW format in Photoshop is that each time you want to open a RAW image in Photoshop you have to run the Camera RAW application. It is actually a separate program and when we use it we don’t really open the raw format image in Photoshop itself.
All this incited Adobe developers to produce Lightroom. You think, Lightroom is a Photoshop substitute? No, it is not. The Adobe Bridge Camera Raw app is still useful for minute changes, adding elements and for other effects.
Lightroom includes Adobe Bridge Camera Raw which makes it possible to transfer all changes from Photoshop to Lightroom.
Lightroom is not a simple image editor. It has a number of organizing, sorting and searching functions, too.
Lightroom operates a database of images, storing complete image meta-information
Naturally, you can have several catalogues, if you like, and you may store your images locally, on a disk or on the Web.
The best thing about Lightroom databases is that its edits are non-destructive. Rather than overwrite the existing image file with changes, Lightroom stores the information on the adjustments themselves. If you wish to revert certain changes to the image, just take a step back and that’s it.
Lightroom can export your RAW- files along with XMP-files (the files for storing meta- and edits information).
Lightroom interface
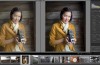
When you run Lightroom, it welcomes you with its interface of subdued dark colours. This colour scheme was chosen by Adobe on purpose. It helps users to concentrate and sets off the colours of a given image.
Lightroom modules
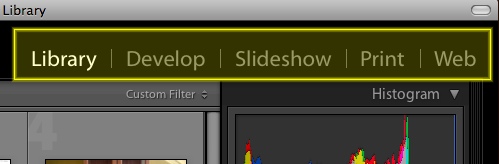
Five Lightroom modules
Lightroom has five built-in default modules: Library, Develop, Slideshow, Print и Web. Switch between them, using the links Menu situated top left.
The first two are the main modules, used for organizing and adjusting images. The last three will help you make a slide show, apply a ready print or create a photo gallery to be published on the Web.
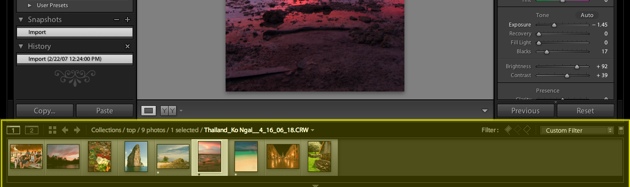
The filmstrip
The string of thumbnails of all the current images you work on is called the filmstrip. It may show images from the same folder as well as a string of different folders.
The filmstrip stretches itself below the work area, parallel to its bottom-line.
It serves for easy access to a particular image – no need to go back to the library.
All actions in each module can start from the filmstrip.
The sidebars (panels)
The main Lightroom window-pane is divided into three areas. The right and left side panels – or sidebars – show the actions. The work area takes up the center.
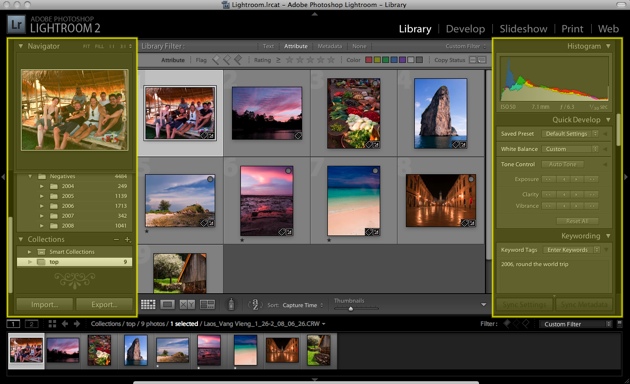
Each module will have its own sidebars. They show module-specific actions and libraries.
Let’s say, you are using the library module. The central area is taken up by your current image(s). The left panel (sidebar) will show your folders, search slots and other filters. The sidebar to the right contains some quick edits you can make there.
Hot keys
Another thing we love about Adobe Lightroom is a whole variety of hot keys and combinations making the work so much easier.
Tab shows and hides the sidebars. Want to concentrate on the image alone? Hit the Tab.
Shift+Tab will show and hide all the panels, including the filmstrip.
Shift+F switch you to the full screen mode.
Shift+L can dim and put out the surrounding light, putting it back on when need be.
Command+/ will show you the whole hot list of the current module.
Now, when you know the basics of Lightroom, you may want to try the app for real.
About new version Lightroom 6 read here (Coming soon :)