
Free Luminar Lightroom plugin
Have you ever opened an image in Lightroom, one that you thought was good, but then could not figure out how to make it better? If so, you’re not alone.
Lightroom is a great application when you know what you want to do. However, for those other times when you are not quite sure, Luminar, a new image editor from Macphun, might be a better fit. Its extensive set of creative adjustments will help you find the art within your pictures. You will uncover things that you did not even know were there. In addition, the best part is, these two apps can work together, with Lightroom acting as the host and Luminar as a plugin.
 The Luminar Difference
What is unique about Luminar compared to Lightroom is that it is designed to lead you down a path to discovery. As you browse the different presets, your visual options go beyond color and tone. You are able to explore mood and emotion as well.
How does this happen? Two primary components in Luminar facilitate this process. The first is an extensive set of filters, which can then be combined into presets. The result is one-click transformation of your images. It seems simple when you are doing it, but many powerful algorithms are at play.
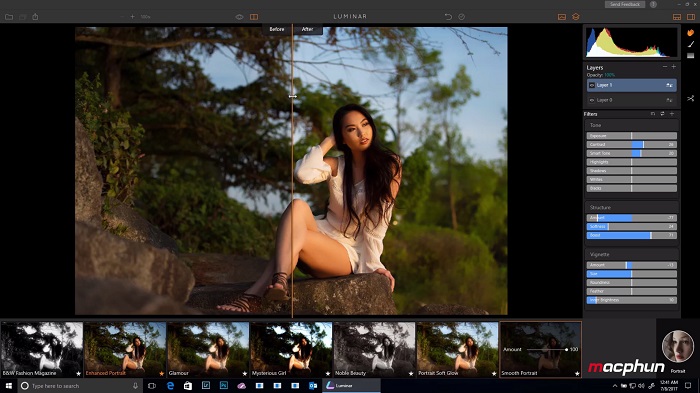
 Once you find a preset, you can control the amount, allowing you to adjust its intensity.
For a better understanding of how this works, here is a closer look at these filters, and how they can be grouped into presets.
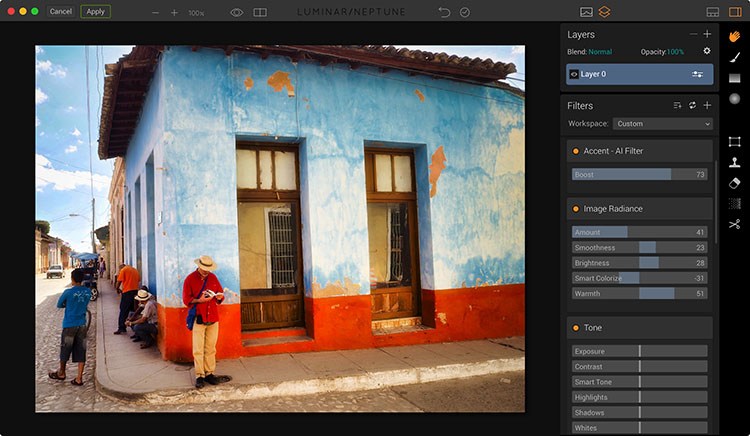
Filters in Luminar Lightroom plugin
Luminar’s filters appear similar to the adjustment sliders that you are using in Lightroom, but with a bit of a twist. Many of them go beyond color and tonal corrections into areas that actually affect the mood of the image. Therefore, not only do the pictures look different; they feel different as well.
For example, look at some of these Luminar filters: Accent AI, Golden Hour, and Image Radiance. When you enable one or more of these for your image, the appearance changes in ways that you might not have seen before.
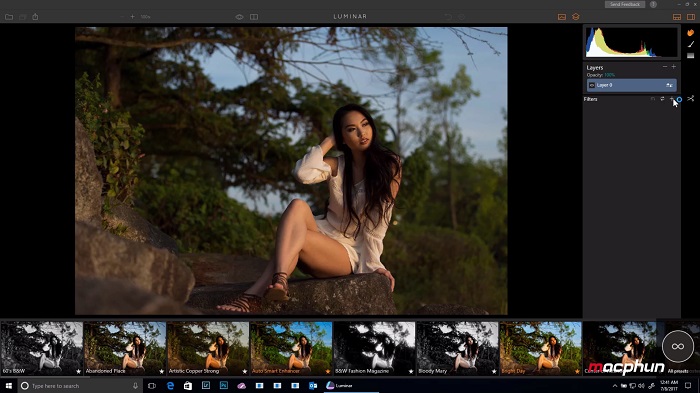
 Image before editing in Luminar
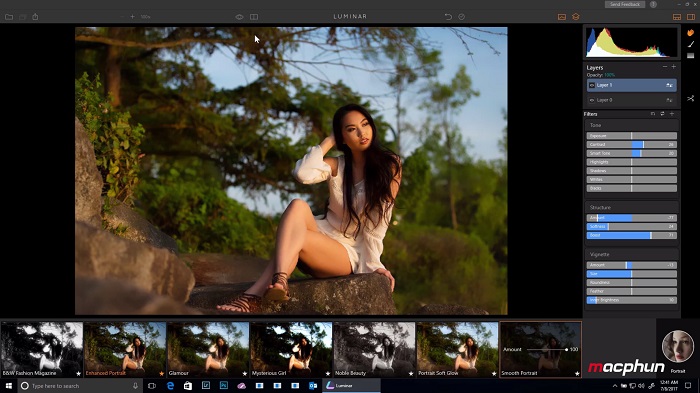
 After editing in Luminar
Currently, there are more than 40 adjustable filters in Luminar. Some are the basic tools that you need such as Sharpening and Remove Color Cast, and others, such as Soft Glow, The Orton Effect, and Dramatic. They all work together to help you tap your creativity.
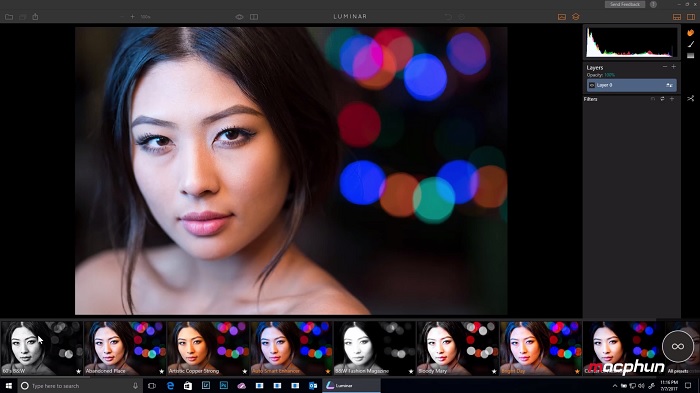
Presets in Luminar
By combining multiple filters into a one-click preset, you can quickly browse a variety of different looks just by clicking on the thumbnail for each one. Luminar ships with dozens of these presets, and hundreds more are available for download. You can even create your own presets.
Think of including presets as a recipe that uses exotic ingredients. To sample one, load an image into Luminar, browse the preset thumbnails, and then click on one that looks appealing. All of the filters that comprise that preset will be instantly applied to your picture.
Here is an example that illustrates the visual impact created with Presets.
 The blue sky and water are attractive in this original image, but the bluish tones on the structure dull its impact.
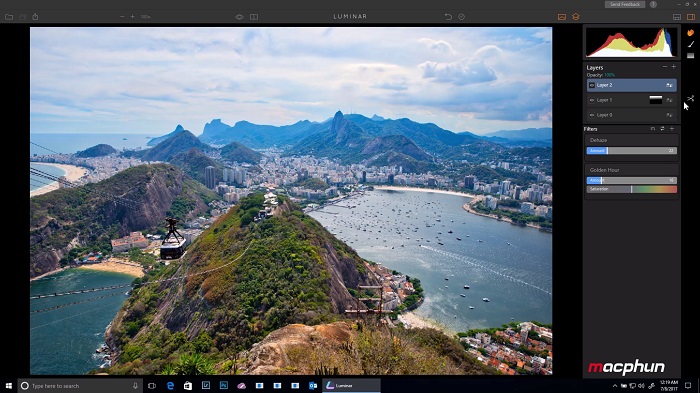 Using the Just Wow preset in Luminar.
After browsing Luminar’s presets, it becomes clear how the overall composition can be improved by warming the tones on the structure and creating a complementary color scheme. This was handled quickly with the Just Wow preset. You might not have realized that is what the image needed. But it is easy to recognize once it is displayed for you.
Integrating Luminar with Lightroom
Using Luminar is easy, and so is integrating it with Lightroom. If you have ever used a plugin before, you already know how this works.
In Lightroom, you choose an image that you want to send to Luminar. Lightroom prepares the file and sends it off. Once it has opened in Luminar, you experiment with the presets and filters until you are happy with the result. When you apply the changes, the image copy is returned to Lightroom and placed next to the original.
Here are the actual steps.
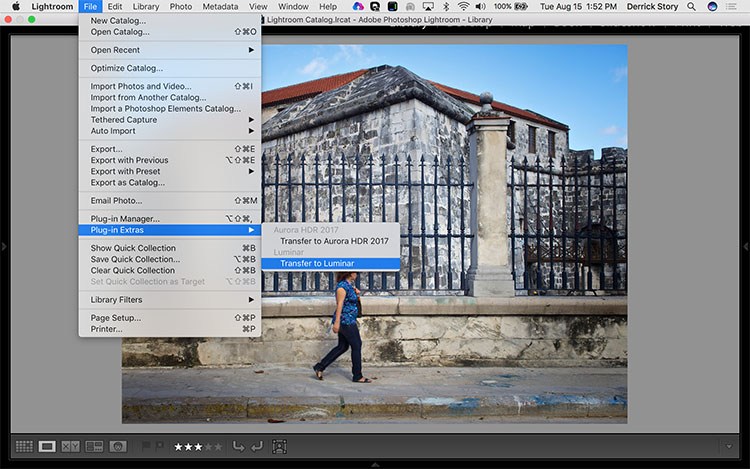 In Lightroom, go to File > Plug-in Extras > Transfer to Luminar. Lightroom will prepare the round trip file according to the parameters that you have established in Preferences > External Editing. You might want to choose Tiff for the format because of its lossless nature.
 In Luminar then click the Apply button in the upper left corner when you’re ready to send the file back to Lightroom.
 Luminar will process the image before returning it in Lightroom.
 Checked the box, «Stack with Original» in the External Editing Preferences dialog, after that Luminar file will be placed in your catalog next to the original.
Advanced Techniques with Luminar
If you want to work on specific areas of an image instead of applying an effect to the entire photograph, you can accomplish this with brushes and layers as in Lightroom.
Brushes are very easy to use. When you have added a filter to an image, let us say Color Balance, it is applied globally by default. In other words, the entire image is affected.
If you would rather just have it affect a specific area instead of the whole picture, click on the Brush icon in the right side toolbar and start painting. Now the effect is only used in the areas that you have brushed.
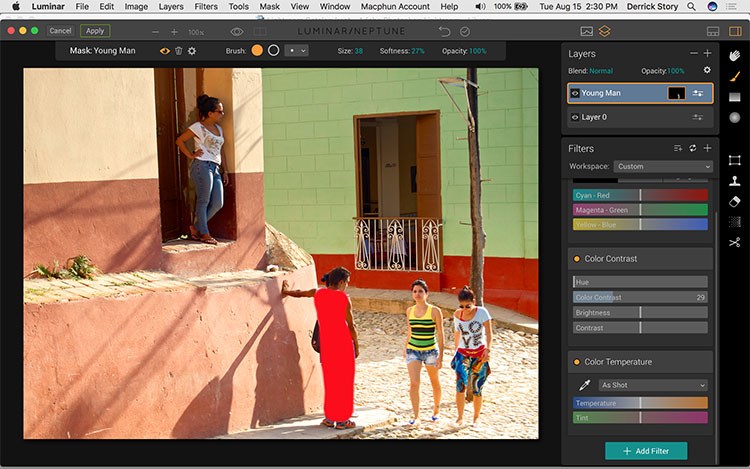
In order to adjust the young man is clothing without affecting the other parts of the image, you can use the brush in Luminar to select his clothing, and then use the Color Contrast filter to enhance it.
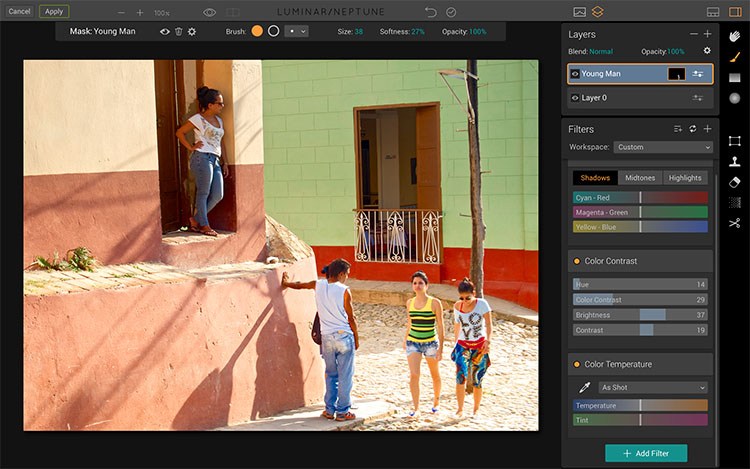 Now his shirt and pants have a little more pop, and work better with the other elements of the photograph.
This process becomes more powerful when you add layers to the mix. Layers are overlays that you can turn on and off and adjust their opacity. Therefore, if you have spent a fair amount of time painting in an effect, but feel that it is a bit too heavy handed, you do not have to redo all that detail work. You can instead adjust the opacity or the blend mode for that layer to achieve the effect you want.
You can even stack multiple layers with different approaches, and then only enable the ones you like best for the finished image.
Sending the Photo Back to Lightroom
Regardless if you have used one filter or a dozen, everything is flattened when the photo is returned to Lightroom. The same is true for the layers.
It is time to enjoy your creation in Lightroom. Back in Lightroom
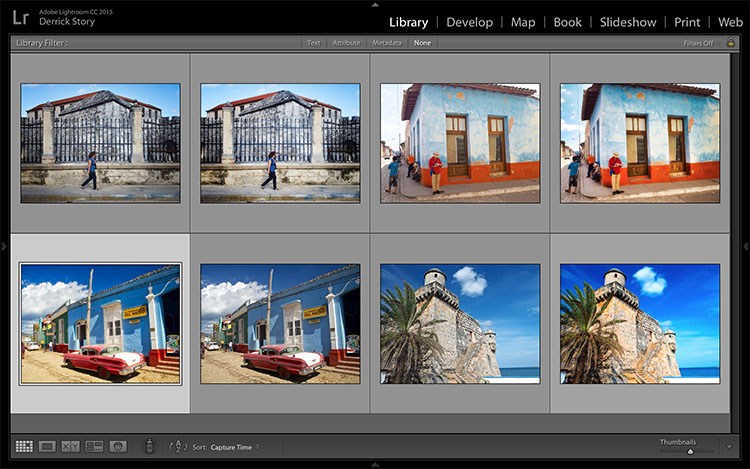 Originals and Luminar edited images back in Lightroom.
In fact, you can keep working on it there. If for example, you decide that the picture needs further sharpening, that can be applied to the Luminar picture.
The nice thing about having the Luminar images back home in your Lightroom catalog is that you can maintain their organization, and add metadata to those shots.
Using Luminar as a Standalone App
There is one constraint to tapping Luminar as a Lightroom plugin. The image is flattened upon its return to the host app. Therefore, you lose all of your layers.
Save command in Luminar
When using Luminar as a standalone app, you can use the Save command to preserve your work and return to it later.
If you wanted to preserve those layers, an alternate workflow is to open the image in Luminar directly, using it as a standalone app. Then, instead of having to flatten the image, you can use the Save command and preserve the layers and the history as an .lmnr file. This allows you to go back and pick up right where you left off. Not a bad idea for long-term projects.
Additionally, you can export a flattened version of the image out of Luminar and import it into Lightroom. This gives you a finished file, organized neatly in your catalog.
Windows and Mac Platforms
The developer of the Luminar editor, Macphun, has released a free public beta for Windows, previously only available for Mac computers. Luminar is a graphical editor that can compete with Adobe Lightroom. At the moment, the image editing module is implemented. A photo library module is expected to be added soon.
Luminar currently offers 300 different tools for working with photos, more than 50 preset presets, each of which can be edited to fit your needs, many filters, support for the latest RAW file profiles and much more.
Now in the version for Windows there is not enough selection of working areas, support for plug-ins, deletion of objects, noise reduction and some other tools. These features will be added to the public beta. The full version for Windows will be released later, until the end of 2017.
You can free download Macphun Luminar for Windows here.
Conclusion
Luminar is a delightful complement to Lightroom. After just a few weeks of use, you will likely notice an increase of best images in your catalog. In addition, some of them very well may feel different from what you have created before.
See also: How to Use Natural Light for Outdoor Portraits