How to Understand ISO on Your Digital Camera
Hello Friends, today I will tell you what an ISO digital camera is, what ISO affects, how it is designated and how to set it up.
Do you use auto modes?
Are you the type of photographer who shoots in Manual mode? Or do you go to the other extreme and use one of your camera’s fully automatic exposure modes, such as Program? If you tend to go the fully automatic route then it’s quite possible you’ve never paid much attention to your camera’s exposure settings – ISO, aperture and shutter speed.
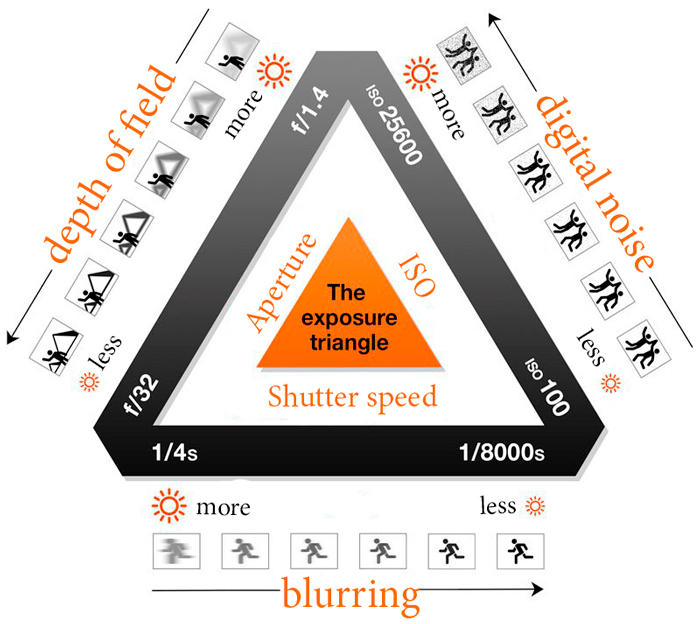
Aperture, you probably already know, controls the depth of field. Shutter speed affects the way moving subjects are recorded by the camera. But what about ISO? ISO is a remarkable setting in that it enables you to take photos in any scene from bright sunlight to candle light. It’s thanks to ISO that your digital camera is so versatile.
ISO is one of the main parameters of exposure. Together with the exposure and the aperture, the ISO is the triangle of exposure.
 How does ISO mean?
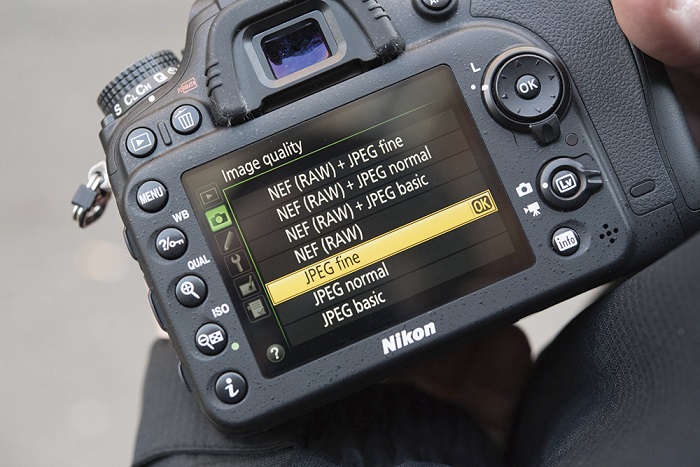
It is indicated by numbers in the range 100-6400 (in chambers of different classes there can be both large and small extreme values). On the camera ISO is indicated by the abbreviation ISO 200 (where 200 is the value of photosensitivity). There can also be extended iso values.

Extended values iso.
In the iso settings, you can find values such as Lo 1 and Hi 1 (and similar to them).
These are nothing but abbreviations:
Lo – Low – the value is below the minimum, for example Iso 100 and iso 50 on my camera with a minimum iso 200.
Hi – high – value above the maximum, for example iso 12800
They are needed for conditions where standard values are not enough, Lo is needed in very good lighting, in order to be able to reduce the shutter speed. Hi is necessary in very dark conditions, so that it is possible to increase the shutter speed and take the shot without blurring. In both cases, the quality of photos deteriorates, so I do not recommend using these values without special need.
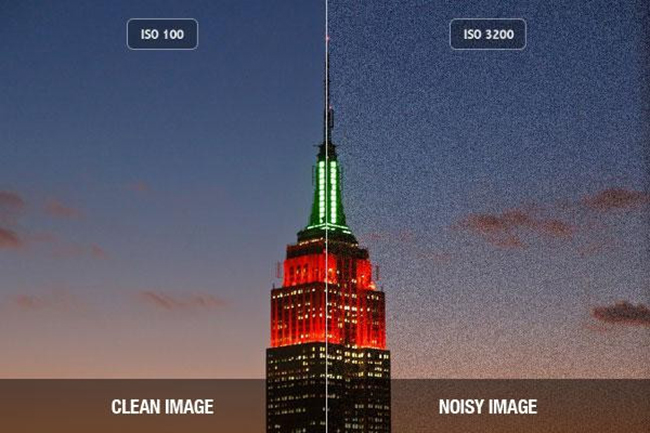
The sensitivity is directly related to the amount of noise. The more ISO, the more noise, and the film grain size. Why? Purely technically, in general this is the topic of an extended article.
At ISO 100, the signal is removed from the matrix without gain, at 200 – amplified by 2 times and so on. At any amplification there are noises and distortions and the more amplification, the more side effects. They are called noise.
The intensity of noise is different on different cameras. At a minimum ISO, noises are not visible and are also less apparent when processing a photo. Beginning with ISO 600, almost all the cameras make a lot of noise and you need to use noise reduction programs to get a quality frame.
Digital cameras with full-frame sensors create images with less noise at any given ISO setting than crop sensor cameras (that is, the sensors in APS-C and Micro Four-thirds cameras).
But, as ISO performance has increased, the gap between full-frame and crop sensor has narrowed. Image quality (noise) is not the only reason why you might buy a full-frame camera instead of a crop sensor one, but it’s no longer the major consideration it once was.
How to set up ISO?
For each camera model, it can be adjusted in the camera menu, or by pressing the button on the camera body and simultaneously rotating the control wheel.
It is important to remember the following:
When you turn on the camera and start shooting, check which ISO is on and adjust it based on the shooting conditions. Often novice photographers forget about this option, and the value remains tuned either automatically or from a previous survey, and they do not understand why the photos do not work. It is very good to take the rule of yourself to start shooting with an estimate of the illumination, and ISO settings. Over time, you will develop a skill, and when you enter a new room, you can determine the shooting parameters yourself quite accurately.
Small ISO = high quality. Try to shoot at the lowest possible ISO value, which allows you to set an exposure that will provide sharp light photos.
High ISO = low quality
But don’t be afraid of high ISO
Having said that, there is no reason to be afraid of the high ISO on your camera. The key is to test your camera at each major high ISO setting (1600, 3200, 6400, 12800, etc.) to see how much noise you get in your images and what your personal tolerance is for noise with your camera. You might, for example, find that you are happy with images taken at ISO 6400, but not at 12,800. Once you’ve established that then you can work within those limitations.
Subjects such as natural light portraits, or photos taken indoors, often require high ISO settings, especially if they are done when the ambient light levels are low, such as dusk. The high ISO settings of modern cameras are a great benefit in low light conditions because they let you experiment with taking photos hand-held that years ago you could only have attempted with a tripod (and slow shutter speeds) or by using a flash to light the scene.
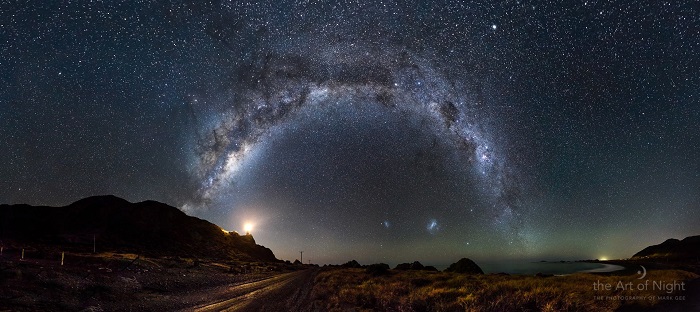
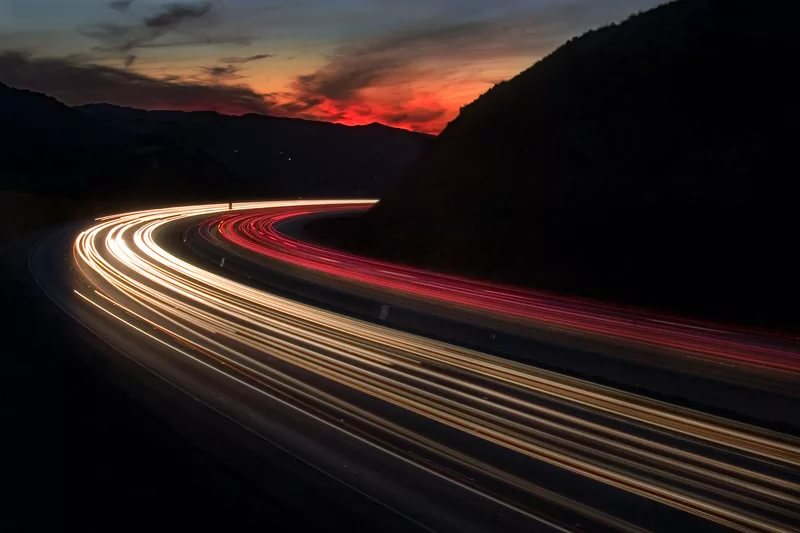
Another type of photography that high ISOs enable is astrophotography. High ISO settings are required to get a good exposure of the night sky that captures the stars without the trailing effect created by using shutter speeds longer than 20 seconds.
ISO for landscapes, architectural and studio photography
The best quality images (i.e. those with the least noise) are always made at the lowest possible ISO setting. You can use ISO 100 quite comfortably on a hand-held camera in bright sunlight, but it’s more difficult in low light conditions, for example at dusk or indoors.
For those situations, you can use low ISO if you have a tripod to support your camera. The tripod allows you to use long shutter speeds without having to worry about camera shake. For that reason, low ISOs are ideal for landscape and architectural photography, where it’s normal for photographers to use tripods.
Low ISOs are also good for studio photography, as most studio lights are powerful enough to give good illumination at ISO 100.
I used ISO 100 for this photo and used a tripod to prevent camera shake.
 Auto ISO and why it should not be used ?!
Modern SLR cameras offer us to work in the mode of automatic selection of photosensitivity “Auto ISO”. Manufacturers of digital cameras assure that, the “Auto ISO” mode facilitates the process of photographing and makes it pleasant and easy. In general, the continuous care of the user of the SLR.
But, not everything is so easy and pleasant.
It’s a fact that most auto owners of cameras that post photos of their pets in social networks will automatically use the auto ISO function. But to novice photographers who seriously decided to study photographic work, I highly recommend turning off Auto ISO and forgetting about the existence of this function at all.
Why is Auto ISO this bad ?!
The digital camera, in the automatic ISO selection mode, will set the ISO always much higher than the actual shooting conditions require. And you will get more digital noise than with manual ISO setting.
Suppose you can shoot at an exposure of 1/15 second. But the camera will automatically increase the ISO value due to the included selection function to reduce the shutter speed. Which will lead to the appearance of some amount of digital noise.
The amount of digital noise will be determined by the value of the ISO itself and the quality of the camera’s matrix. Naturally, the higher you specify the ISO value, the greater the digital noise in the image. And the worse your camera, the more amount of digital noise you will observe.
The task of the camera and the fact that it was invested by the creators is reduced to providing a clear and correctly exposed picture. According to the camera manufacturers, digital noise is not important. They do not bother that digital noise can spoil the photo.
When shooting, you should always try to shoot at low ISO and the ISO auto-selection mode, you are clearly not an assistant here. It should also be added that automatic modes do not allow the photographer to grow professionally. Auto ISO accustoms you not to think once again over the shooting conditions.
Conclusion
Recent advances in camera technology mean that many photographers can get great results from their cameras at ISO settings up to 6400 and beyond. It’s a revolution that has changed the way some photographers work by opening up the possibility of working creatively in low light conditions. But it’s also important to understand that sometimes it’s best to use low ISO settings for the best image quality.
So, in this article we have learned – what is the photosensitivity (ISO) of the camera.
Secure the material with a practical exercise – in the manual shooting mode “M” Set the shutter speed to 1/800 (for example), the aperture to f5.6, and remove the same object at all ISO values, and compare the difference. At some values of the photo, the results are too dark, or even black, with some too light, this exercise shows how the illumination depends on the ISO.
Try, experiment, if something remains unclear – ask questions in the comments.
See also: Which Lens to Choose