In an age where iPhones are shooting stellar images and high quality DSLRs are coming down in price, it’s becoming increasingly challenging for food photographers to make a living as professionals. As a food photographer in Seattle, I’ve noticed that many of my clients have become opinionated about what makes a good photo, and in many cases are shooting right next to me with their iPhones. I take it as a positive sign that clients, and most people with smartphones, are becoming more informed and educated about photography, but there is of course the notion that this could very soon make professional photography even more undervalued.
So, what’s a professional food photographer to do? Here are some tips to help make sure you capture quality food photography images that attest to the value of paying you, a professional, to do the job.
Tip #1: Don’t use natural lighting.
Natural lighting is fantastic, and I still try to use it as often as possible. However, many of my clients have realized the value of using natural lighting and tend to shoot their iPhone photos in naturally lit areas. Taking into account the quality of iPhone photos these days, it’s not unusual that their cell phone photos look pretty darn good, even compared to my DSLR shots. To make sure your photos always look unquestionably better than those taken with a cell phone, use natural lighting less and do some experimenting with strobes and off-camera flash.
Tip #2: Shoot in dark spaces.
Taking tip #1 into consideration, take full advantage of your professional-grade camera’s low lighting capabilities, and/or your strobe lighting knowledge, by shooting dishes of food in spaces where iPhones have a slim chance of performing well. This is also a good opportunity to incorporate some of the unique features of the restaurant’s interior spaces, into your main shot.
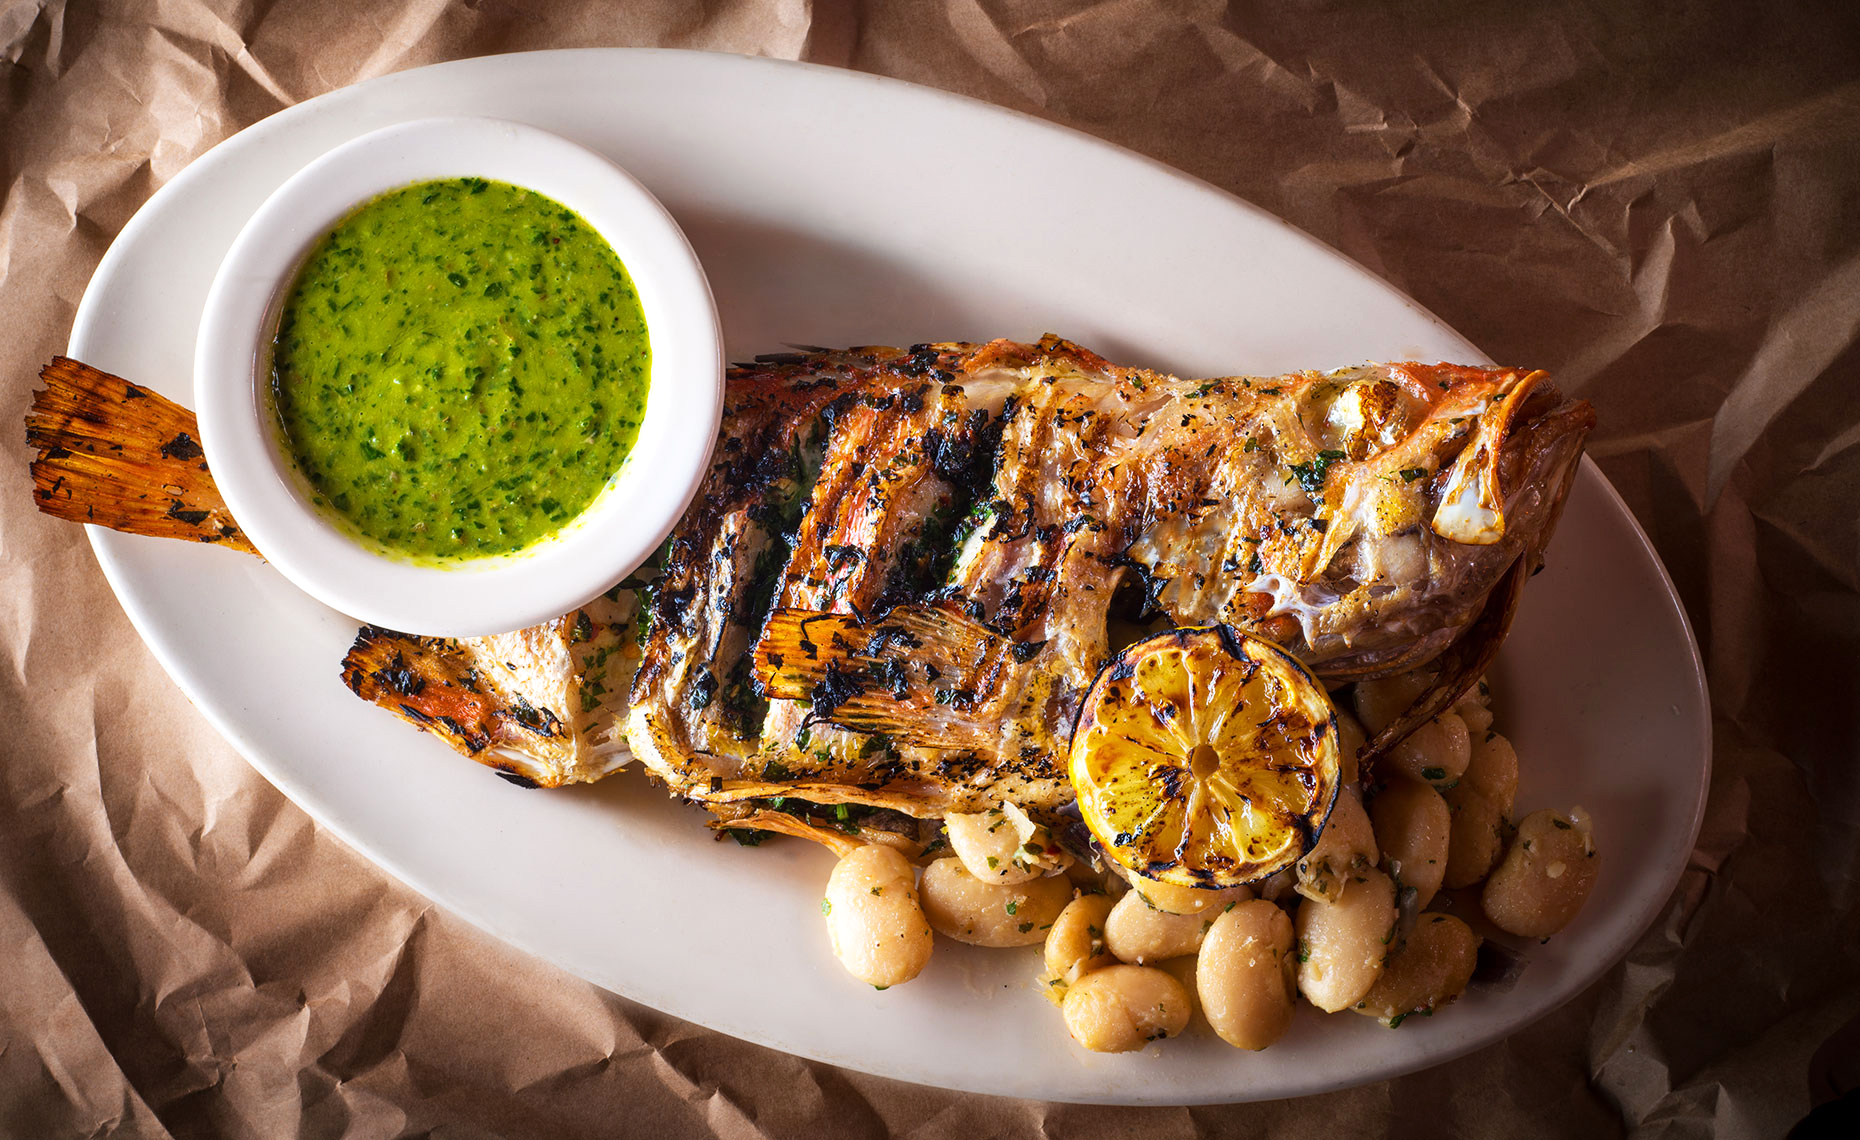
Photographed in an extremely dark space, this photo wouldn’t have been possible without a DSLR and strobe.
Tip #3: Use a macro lens.
While cell phone cameras are becoming equipped with better features with every new release, many still can’t shoot quality macro photos the way that DSLRs can. Use this fact to your advantage and make a macro lens your best friend when shooting food photos. Don’t be afraid to get up close and personal, and capture the details of the dishes you’re shooting. These photos may not be exactly what your clients have in mind, but at the very least it’s always a good thing to show them an alternative perspective that reminds them why they hired you.
Tip #4: Be a creative director and/or food stylist.
Most amateurs approach food photos very statically, opting to shoot dishes from a seated position or overhead. Very few will get creative and incorporate people, props, or activity in their shots. This is your opportunity to shine as a food photographer. Move beyond standalone food photos and use your creativity to make a more dynamic shot. Ways to do this might be capturing action shots, adding a beverage or extra silverware in the shot, or even working with chefs to help them plate dishes in ways that will be photographically appealing. These skills are also part of the reason your client is hiring you, so don’t be afraid to exert your creative authority.
Tip #5: Shoot tethered.
A very simple, yet highly effective, way to come off as a polished, professional photographer is to shoot tethered. If you’re unfamiliar with tethered shooting, it is basically the act of connecting your camera to a computer or tablet, which allows your clients to see your shots on a screen just seconds after you’ve pressed the shutter. This might sound intimidating, but it’s a very simple way to make sure that you and your client are on the same page throughout the photo shoot. It also invites your client to actively participate in the shoot and give you feedback and their own ideas. Tethered shooting is very easy to do using a USB cord or even Wi-Fi technology if your camera has this capability. If you have the means to shoot tethered, definitely consider offering this service to your clients.
Tip #6: Transmit photos via Wi-Fi.
If you have a client who is shooting alongside you with their iPhone, chances are it’s because they want access to photos for immediate posting on social media. Do yourself and your client a favor and offer to send them images on the spot using in-camera Wi-Fi, or do a few quick edits and transmit some shots directly from your computer if you’re shooting tethered. Depending on your agreement with your client, you could even charge a little extra for these services.
Over to you.
Do you have other tips for offering more professional-looking food photography that outperforms iPhones and other amateur cameras? Let me know in the comments below!
